Showing posts with label Metro Style Application. Show all posts

Saturday, September 22, 2012

Setup Controls using C# code, instead of XAML.

In this exercise, we are going to add TextBlock using C# code, instead of XAML.

Start Visual Studio Express 2012 RC for Windows 8, New Project..., using template of Visual C# Windows Metro styles, Blank App (XAML), with name of helloMetro_Csharp. OK.

New Project..., using template of Visual C# Windows Metro styles, Blank App (XAML), with name of helloMetro_Csharp.


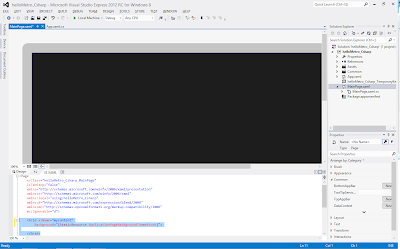
Double click on MainPage.xaml in Solution Explorer to open the XAML defination of the screen. Modify the code to add x:Name="mycontent" for <Grid> element. And save it.

Modify XAML to add x:Name


    <Grid x:Name="mycontent"
        Background="{StaticResource ApplicationPageBackgroundThemeBrush}">

    </Grid>


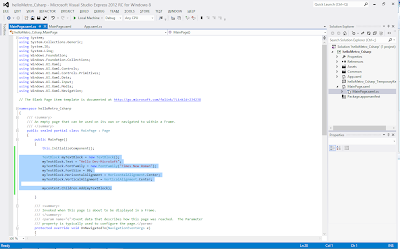
Double click on MainPage.xaml.cs to edit the code behind MainPage.

Modify the code behind MainPage


        public MainPage()
        {
            this.InitializeComponent();

            TextBlock myTextBlock = new TextBlock();
            myTextBlock.Text = "Hello Dev-MicroSoft";
            myTextBlock.FontFamily = new FontFamily("Times New Roman");
            myTextBlock.FontSize = 80;
            myTextBlock.HorizontalAlignment = HorizontalAlignment.Center;
            myTextBlock.VerticalAlignment = VerticalAlignment.Center;

            mycontent.Children.Add(myTextBlock);

        }


Save and Run it.

Hello Dev-MicroSoft


Tuesday, June 12, 2012

Set background using LinearGradientBrush

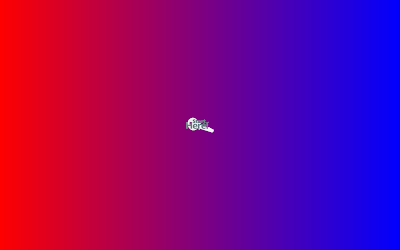
Example to set background using LinearGradientBrush.

Set background using LinearGradientBrush


    <Grid x:Name="root">
        <Grid.Background>
            <LinearGradientBrush StartPoint="0 0" EndPoint="1 0">
                <GradientStop Offset="0" Color="Red" />
                <GradientStop Offset="1" Color="Blue" />
            </LinearGradientBrush>
        </Grid.Background>
    </Grid>


Friday, June 8, 2012

Add UI element in Metro Style application using C++ code

To add UI element in Metro Style application dynamically using C++ code, instead of XAML:

Modify XAML to have a name in the root content, the <Grid> in this exercise:
    <Grid x:Name="root" Background="{StaticResource ApplicationPageBackgroundThemeBrush}">

    </Grid>


Modify the C++ code behind:
MainPage::MainPage()
{
 InitializeComponent();
 
 Uri^ imageUri = ref new Uri("http://goo.gl/fHDLv");
 BitmapImage^ bitmapImage = ref new BitmapImage(imageUri);
 Image^ image = ref new Image();
 image->Source = bitmapImage;
 image->Width = 100;
 image->Height = 53;

 root->Children->Append(image);


}


Add UI element in Metro Style application using C++ code


Monday, June 4, 2012

Load Image using XAML

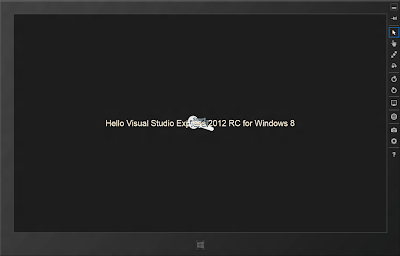
To load Image in Metro style app, simple insert <Image...> elements in XAML.

Example:

    <Grid Background="{StaticResource ApplicationPageBackgroundThemeBrush}">
        <Image Source="http://goo.gl/fHDLv"
               Stretch="None"/>
        <TextBlock
            Text="Hello Visual Studio Express 2012 RC for Windows 8"
            FontFamily="Arial"
            FontSize="30"
            Foreground="AntiqueWhite"
            HorizontalAlignment="Center"
            VerticalAlignment="Center"/>
        
    </Grid>


Load Image using XAML


Thursday, May 31, 2012

C++ and DirectX for Metro Style Games


DirectX, the most popular 3-D game API, is directly accessible by Windows 8 metro-style applications in C++. If you have a C++/Direct3D codebase, or want to create a 3-D game, this talk will show you how to use C++ and DirectX to build metro-style apps. You will also learn about new Windows 8 metro features like process lifetime management, CoreWindow, asynchronous execution, live tiles, and display rotation, and the latest 'best practices' for their use from the perspective of C++/DirectX game development.

Friday, May 25, 2012

Create Metro style application using Javascript


- Click New Project... in Visual Studio 11 Express Beta

- Select Javascript Windows Metro Style template, for Navigation Application, enter name and location, and click OK.


- The default code will be generated for you.


- Run to see what it look, press F5 to build, deploy, and launch the app.


Now we can try to modify something on the Welcome page.
-  Expand html folder our project name, HelloJSMetro, double click to open homePage.html. You can see, it's the html code of or welcome page.


- Modify something:

        <section aria-label="Main content" role="main">
            <p><h2><a href="http://dev-microsoft.blogspot.com/">Dev-Microsoft.blogspot.com</a></h2></p>
        </section>


- It's simple html code, click the link to open my blog ("http://dev-microsoft.blogspot.com/") in Metro IE.


Saturday, May 12, 2012

Run Metro style applications on Simulator


Metro style apps are full-screen and respond to user touch and hardware events like screen rotations. The Visual Studio 11 Beta simulator for Metro style apps is a desktop application that simulates a Windows Metro style app. It enables a developer on a single machine to run Metro style applications and simulate common touch and rotation events. You can also choose the physical screen size and resolution that you want to emulate. Location co-ordinates of user input events in the simulator are translated to the co-ordinates of the select size and resolution.

Together with Visual Studio, the simulator provides an environment in which you can design, develop, debug, and test Metro style apps. However, before you publish your app to the Windows Store, you should test your app on an actual device.

*Also apply on on Visual Studio 11 Express Beta for Windows 8


- To enable Simulator, simple select Simulator as the target debug device.


Read more: Microsoft Windows Simulator Touch Emulation


Saturday, April 28, 2012

Hello Metro application using C++, with Button click event handler.

Continuous work from the last post "Create Metro style Hello World in C++ using Microsoft Visual Studio 11 Express for Windows 8 Beta".

- Add a button
With BlankPage.xaml opened. Drag a Button from ToolBox on the Design Panel, place anywhere you want.
With the Button selected, edit in Properties panel to change its Name to "myButton", and change Content under Common to "Click Me".
It can be noticed that <Button> in BlankPage.xaml will be updated accordingly.

- Name the TextBlock
With the TextBlock selected, edit in Properties panel to change its Name to "myText".

- Insert Button click event handler
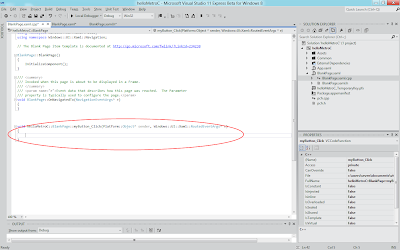
Double click on the Button in Design panel. It will insert Button click event handler, helloMetroC::BlankPage::myButton_Click(), in BlankPage.xaml.cpp automatically.

And Click="myButton_Click" will be added in <Button> in BlankPage.xaml.
    <Grid Background="{StaticResource ApplicationPageBackgroundBrush}">
        <TextBlock x:Name="myText" HorizontalAlignment="Center" VerticalAlignment="Center" FontSize="50" Text="Hello Metro" />
        <Button x:Name="myButton" Content="Click Me" HorizontalAlignment="Left" Margin="552,519,0,0" VerticalAlignment="Top" Width="263" Click="myButton_Click"/>

    </Grid>

- Add code in Button click event handler 
Switch to BlankPage.xaml.cpp, and insert the code in the function helloMetroC::BlankPage::myButton_Click().
void helloMetroC::BlankPage::myButton_Click(Platform::Object^ sender, Windows::UI::Xaml::RoutedEventArgs^ e)
{
 myText->Text = "Thanks";
}


- Build and Run
When the application running, click on the Button will make the TextBlock change. That's.


Friday, April 27, 2012

Create Metro style Hello World in C++ using Microsoft Visual Studio 11 Express for Windows 8 Beta

- New a Project in Microsoft Visual Studio 11 Express for Windows 8 Beta, using template of Visual C++, Windows Metro style, Blank Application, name it helloMetroC.

- The wizard will generate a dummy application for you.

- Double click on the BlankPage.xaml from the Solution Explorer, to start edit it.

- Click TOOLBOX on the left side border, to expend the Toolbox panel. Click to expend Common XAML Controls, drag a TextBlock on the Design Pane.

- Now, you can see a TextBlock in the design view, and a new element of <TextBlock> in XAML view.


- We can edit the XAML directly.
Modify the content of <TextBlock> element like it:
    <Grid Background="{StaticResource ApplicationPageBackgroundBrush}">
        <TextBlock HorizontalAlignment="Center" VerticalAlignment="Center" FontSize="50" Text="Hello Metro" />

    </Grid>


- Select Save All from File menu, to save the solution.

- To build the solution, Build Solution from Build menu (or press F7).

- Run it by clicking on the Play button, or Start Debugging from Debug menu, or press F5 directly.


Next:
- Hello Metro application using C++, with Button click event handler.

Tuesday, April 24, 2012

Create Metro style app in Visual Studio 11 Express Beta for Windows 8

Now you can develop Metro style application on Visual Studio 11 Express Beta for Windows 8.

Test platform
  • A low grade Netbook, BenQ Joybook Lite U101.
  • CPU: Atom N270 1.6 GHz.
  • External Monitor!
  • OS: Windows 8 Consumer Preview.
  • IDE: Visual Studio 11 Express Beta for Windows 8.

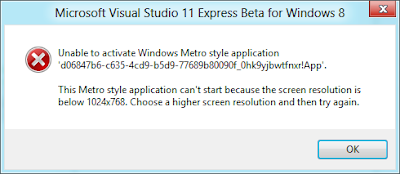
- Install and start Visual Studio 11 Express Beta for Windows 8, on machine with display resolution higher than 1024 x 768.

- Click New Project...

- Select Template of Visual Basic - Windows Metro style, Grid Application, name your project (ex. testMetro), and click OK.

- Visual Studio 11 Express Beta will generate a dummy Metro style application, now you can click the Run button to start it.

- The generate Metro style application.
Metro style application

! Please note that in order to develop Metro style application, you MUST have a monitor with resolution higher than 1024 x 768.
you MUST have a monitor with resolution higher than 1024 x 768